Before the Run
How do I update the instrument’s software?
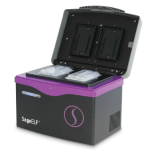
The current version of the SageELF software can be downloaded from the SageELF support page. Please ensure the software is up to date before a run, as newer versions optimize size selection protocols and improve the user interface.
What is the range/capacity of my cassette?
The size fractionation ranges of our cassettes are described in our online store. All SageELF cassettes can be loaded with 100 ng to 5 µg DNA.
My instrument does not calibrate correctly.
Ensure that the calibration fixture is placed with the dark side down. Make sure the lid is completely closed during calibration. If that does not work, try powering down the instrument, unplugging it from the power outlet, and rebooting.
My instrument does not pass the conductivity test
If the Separation Test Fails: Make sure the adhesive plastic covering the cassette is completely removed and that both the cassette and instrument are at room temperature. Readjust the buffer levels of the cassette (See SageELF operations manual Pages 8-9 for more info).
If the Elution Test fails: Check overall buffer level of the cassette. Replace buffer in the elution modules to remove any potential air bubbles. Check for air bubbles in the elution lanes.
After the Run
My markers were not called during a run.
If the instrument does not detect internal markers, it will automatically switch to a timed run. The DNA sample will continue to separate until the estimated distribution matches your programmed values (based on migration time). Once the run finishes, your DNA fractions can be recovered from the elution wells. Their sizes will be slightly less accurate than if the internal markers were detected, but eluted DNA should still fall within 15% of the expected size distribution.
My actual DNA size is lower/higher than the instrument’s estimate.
This is often caused by the sample well not being completely filled. This can affect the current distribution through the gel. Ensure that the well is loaded with 40 µL sample and that the buffer overlay reaches the top of the well. Slightly overfilling is OK.
My yield is unusually low.
When removing elution well contents, gently mix the solution by pipetting several times. Use a nonshearing pipette tip if working with large DNA fragments.
None of these answers helped!
If none of these situations apply or if you need assistance with sample recovery, please call customer service at 978.922.1832 or email support@sagescience.com. Including the log files of the affected run in an email will expedite resolution (see below). We also offer free one hour webinars for new users.
Instructions to Export SageELF Log Files
At the end of the run, the software saves a screenshot (.png) of the main screen and a text file containing the run data. To access these files:
1. Insert a flash drive into the USB port on the front of the instrument
2. Select the ‘Log Review’ tab
3. Select the ‘File Manger’ tab at the bottom of the screen
4. Select ‘Go to Logs’
5. Log files are saved in folders according to the month and year. Open the appropriate folder and highlight the desired files.
6. Click on ‘Copy to Flash’
The software also saves two text files, one each for the calibration and continuity tests. To access these files:
1. Follow steps 1 – 3 above
2. Select ‘Go to QC Folder’
3. Log files are saved in folders according to the month and year. Open the appropriate folder and highlight the desired files. These files are saved with a generic name, only the date and time stamp differentiate the files.
4. Click on ‘Copy to Flash’
5. Once the files are copied, click on ‘Eject Flash’
6. Attach these files to an email and send to support@sagescience.com.
